Are you looking for the easiest way to record the screen in Ubuntu? If you are recently moved to Ubuntu Linux and want to record the screen. If your answer is yes then this guide is for you. Here in this tutorial, we provide detailed instructions on how to screen record in Ubuntu.
You don’t even need to use third-party app software anymore. The gnome desktop shell comes with a native Screen Recorder. Here in this article we also included popular apps like simple screen recorder and obs studio in case you want more options to record screens in Ubuntu. So keep reading this complete tutorial and get the easiest way to record the screen in Ubuntu.
Record the screen in Ubuntu:
There are different methods available in the internet market that help to record the screen in Ubuntu. So it is a very difficult task to find the best one. That’s why we are here to provide the best and most popular methods to record the screen in Ubuntu.
Also Check: Best Screen Recorder Apps
Record the screen in Ubuntu using the keyboard shortcut:
You don’t even need to install third-party software to record the screen on Ubuntu. It comes with a built-in Screen Recorder feature. With the help of hotkey just like on windows, chrome OS, and Mac OS you can start recording on Ubuntu. Just follow the below simple steps that help to record the screen in Ubuntu.
- Simply use the Ctrl+Alt+Shift+R keyboard shortcut in Ubuntu and a screen recording popup window will appear on the screen.
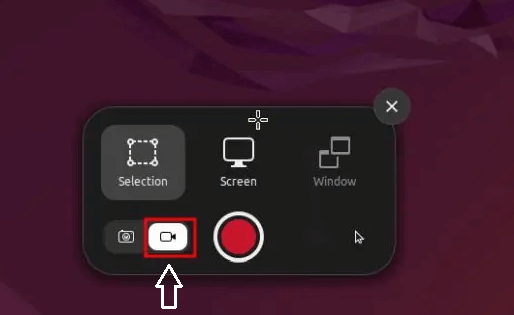
- Now move to the video tab at the bottom and choose your preference whether you want to Record the full screen or a particular window.
- After You select your need just click on the “Record” button and it will start recording the screen in Ubuntu.
- If you want to stop recording then just click on the Red button in the system at the top rate corner.
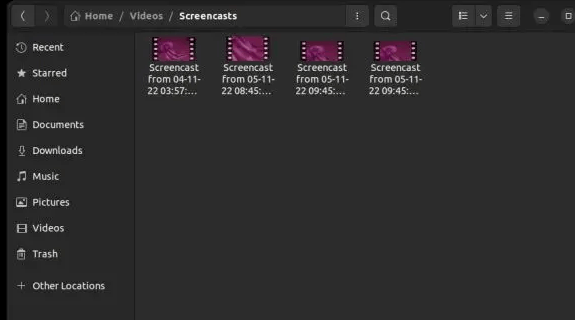
- The recording screen will be saved under Home/Video/Screencasts.
- That’s it. It is the easiest way to record your screen in Ubuntu.
Record the screen with a webcam using OBS studio:
We all know that OBS Studio is the most popular and the best screen recording software recommended for more advanced users. If you want more features like webcam support and way land capability then you must check out this OBS studio.
We already mention it is only recommended for advanced users. If you are a beginner in Ubuntu OS then you can choose another simple method we already listed above.
Follow the steps that help to record the screen in Ubuntu using OBS studio.
- Open the terminal and run the below comments one by one which helps to install OBS studio in Ubuntu.
sudo add-apt-repository ppa:obsproject/obs-studio
sudo apt update
sudo apt install obs-studio
- Once you complete the installation just open the obs Studio and select optimize just for recording during the initial setup.
- Now you need to click on the “+” icon under the sources and select “screen capture”.
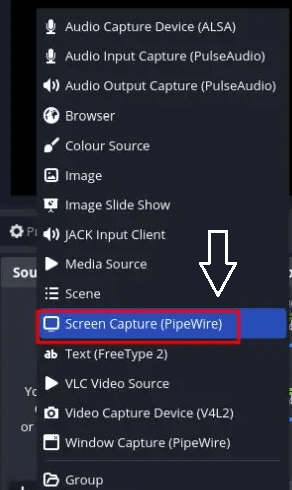
- You can also select window capture for partial and window selection.
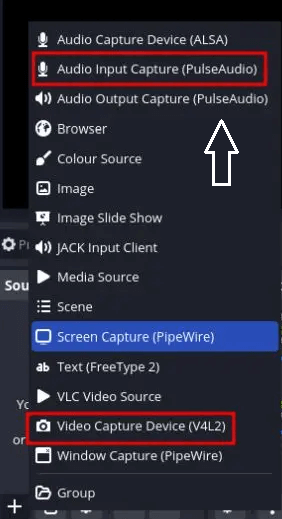
- To add a webcam just click on “+” under sources again and choose video capture device.
- You can also add “audio input capture” to capture the sound using an external microphone.
- Once you complete the setup then just click on “Start recording” and the screen will be recorded with a view and audio.
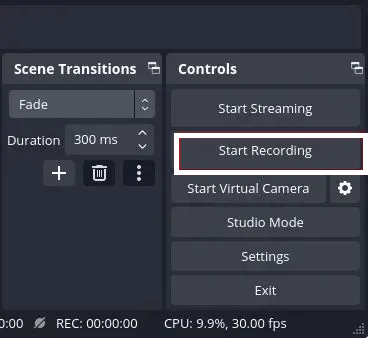
- To stop recording just click on the obs Studio icon in the system tree on Ubuntu and choose the stop button.
- The recording screen will be saved under home/video.
Record the screen with audio in Ubuntu:
If you are looking for advanced software that helps to record the screen on Ubuntu then you need to download a SimpleScreenRecorder. Of course, there are different screen recording software available in the internet market but a SimpleScreenRecorder is the most popular and the best one for Ubuntu.
This software comes with lots of advanced features like audio recording frame rate, selection bitrate customization, Cursor, recording area selection, and more.
It also supports a white selection of media formats like MP4, MKV, and more. Of course, you might face some issues If you are using the wavelength display server. So just keep in mind that and use this software on your Ubuntu.
- First, open the terminal and run the below comment.
sudo apt install simplescreenrecorder
- Now you need to enter the password and press “y” when prompted. It will install a SimpleScreenRecording in Ubuntu.
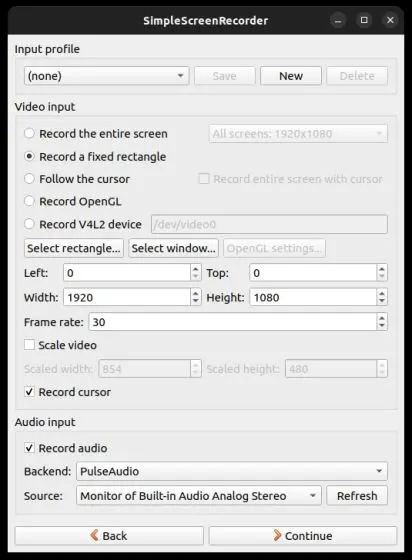
- Open the simple Screen Recorder from the app launcher. Now you need to choose the recording area.
- You can also customize other settings including frame rate, recorder, cursor, and audio input.
- Now you need to click on continue and you will have to option select a media format like MP4, MKV, and more.
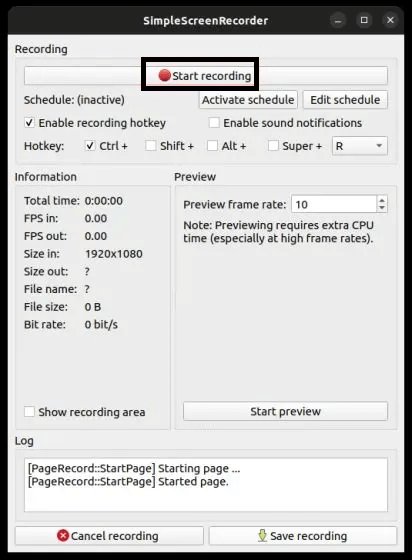
- On the next page click on the “Start Recording” button at the top.
- You can find the progress bar in the system tray at the top rate corner. Just open it with a single click anytime on choose the safe recording option when you are done.
- The recording screen will be saved under home/video.

Conclusion:
These are the best methods that help to Record the screen in Ubuntu Linux. I recommended the built-in Screen Recorder as it is easy to use and works very well. If you have any queries regarding this article feel free to ask using the comment box section. Keep in touch with us for more tech updates and follow us on our social media platform.