Are you looking for the best way to use Google assistant on MacBook PC? Do you want to access Google Assistant on Mac? Are you trying to use Google assistant on MacBook PC? If your answer is yes then you are in the perfect blog. Here we provide a simple guide to installing and setup Google assistant on MacBook PC.
We all know that Google assistant is a mobile-specific product that allows you to access the web page and perform daily activities at your voice command. It is an artificial intelligence-based virtual assistant developed by Google. With the help of this feature, you will be able to search the web make calls keep notes add reminders at performing talk, and many more.
If you have an Android smartphone then you will be easily accessing this Google assistant on your smartphone. But can you use Google assistant on MacBook PC? Yes, of course, With the help of this tutorial you can easily install Google Assistant on your MacBook.
Read Also: Google Meet for PC
If you really want to install and set up Google assistant on MacBook PC then read this complete tutorial without any skip. Our technical team provides a simple guide that allows you to run Google Assistant on your Macbook PC computer.
Steps to install Google assistant on MacBook PC:
Still, there is no official way to get Google assistant on Mac PC. But people want to access the Google Assistant feature on their Mac. That’s why we are providing an official workaround that you can follow this method to install Google assistant on Mac PC.
1. First, you need to download the unofficial Google Assistant client from the GitHub page.
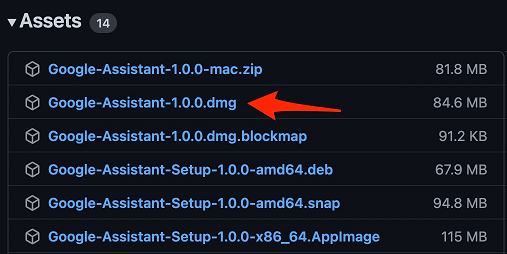
2. Once you complete the download process just installed the file on your Mac.
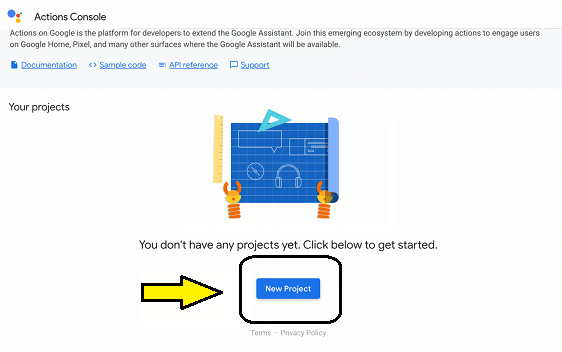
3. Just open the Action Console on your browser and click create a new project.
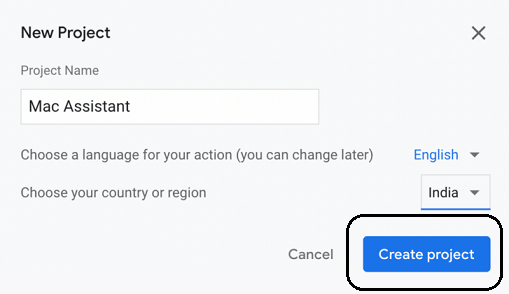
4. Accept terms and conditions. Now you can add the project’s name select your country and language.
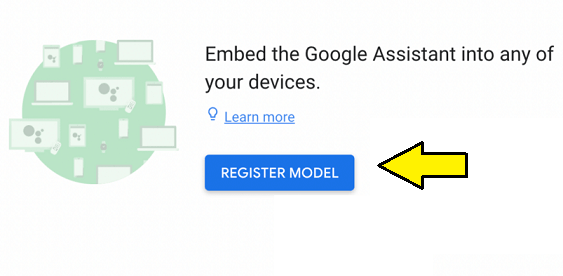
5. Once the new page loads just scroll down and select the “are you looking for device registration”. Just click here option.
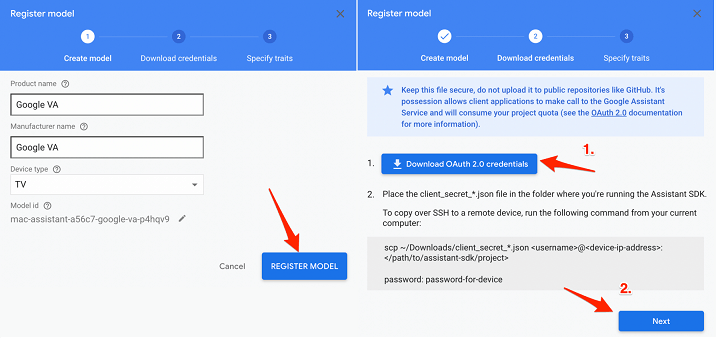
6. Now you need to click on the REGISTER MODEL button.
7. Now you need to enter the detail in product name manufacturer name device type and more.
8. Just click the download OAuth 2.0 Credentials, click next.
9. Select all traits and save them. Once you complete the above process you need to head over to the Cloud Console page and log in with your Google account details.
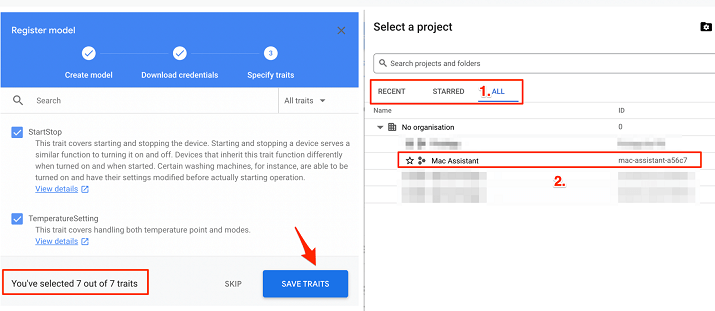
10. Click on the select project button and click on the project you have created.
11. From the left side menu just select API and services.

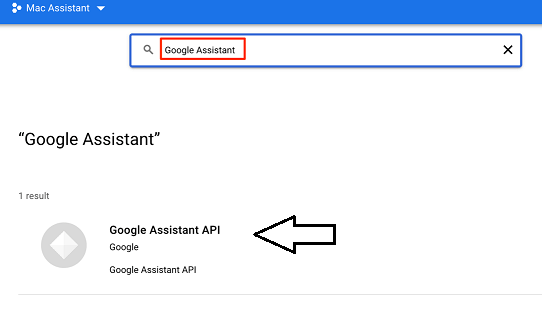
12. Now the page will open where you need to search for Google Assistant and click on Google Assistant API.
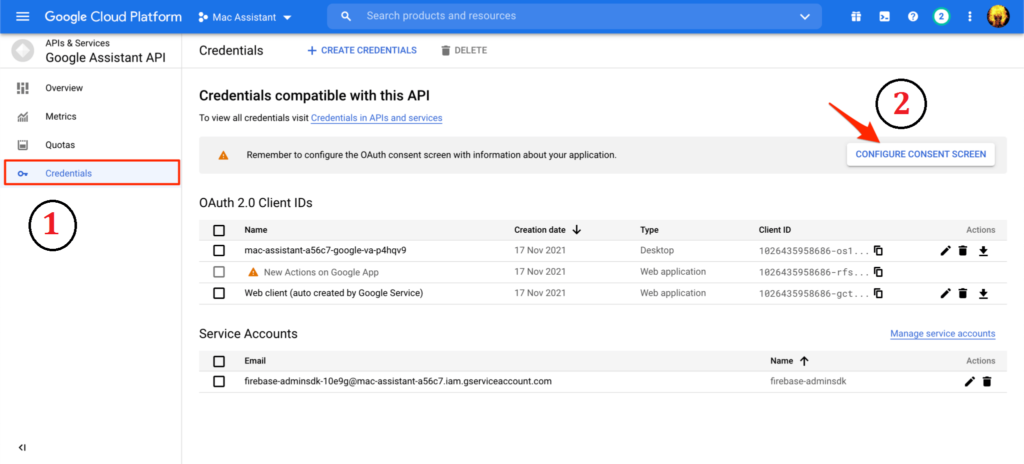
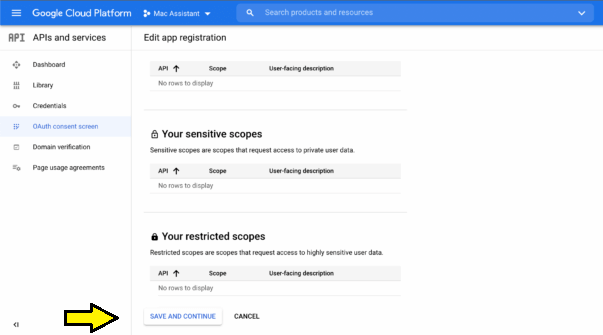
13. Just click on Enable and select credentials then click configure credentials screen.
14. Under the user type option select external and click create button.
15. You need to enter your email id, the contact information on click on the Save button
16. On the last page click on back to the dashboard.
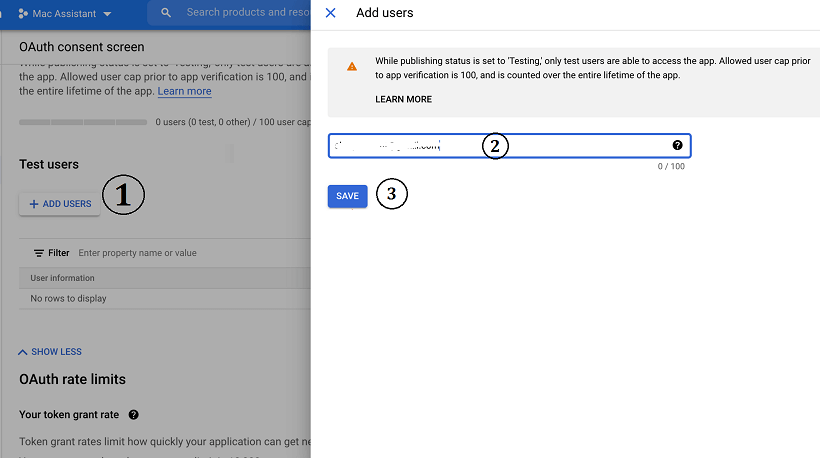
17. Under Test user just select add users and enter your email.
18. Open the Google Assistant app on your Mac system and click on get started.
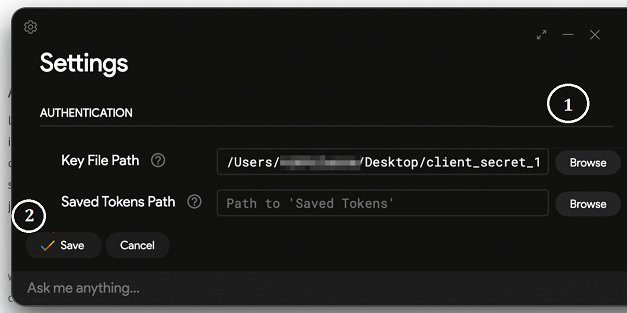
19. Now you need to click on the Settings button on the top left corner of the Google assistant.
20. Select the browser button next to the key file path and choose the JSON file you have to download at the beginning of the process.
21. Just click the save button and select the automatically set path.
22. Now you need to relaunch the Google Assistant app.
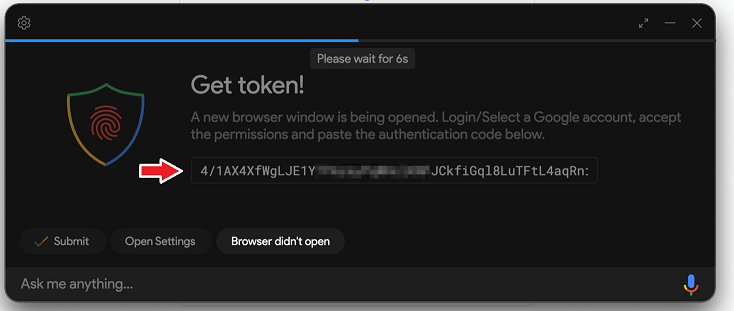
23. It will be redirected to a new page to verify the app. Now you need to select your Google account and click continue.
24. Once you select Allo on the new pop-up project then it appears.
25. Copy the token link and the Google Assistant app will ask for a token, just paste the token click.
26. Again you need to relaunch the Google Assistant app.
27. That’s it, Google Assistant is now ready to use on your Macbook PC.
Conclusion:
I hope this article very helps to install Google assistant on MacBook. If you have any queries regarding this article Drop your queries in the count box section.